Your first flow: save attachments automatically
You build a flow that saves every attachment from your incoming emails to a folder on OneDrive. You use one trigger and one action. This is the pattern behind almost every flow.
What do you need? An Outlook mailbox and OneDrive through your work or school account.
Good to know: the screenshots on this site show the Dutch version of Power Automate. The English names of menus and buttons are used in the text, so you can follow along in your own language.
How to choose dynamic content
In many fields you do not type fixed text but use data from an earlier step, such as the name of an attachment. This is called dynamic content. Here is how you pick it:
- Click in the field. Two buttons appear next to the field: for dynamic content and fx for an expression.
- Click the lightning bolt and choose the item you want from the list, for example Attachments Name.
- The item appears as a blue chip in the field. Use the cross (×) in the chip to remove it again.
You will learn how expressions work in lesson 4.
Step by step
-
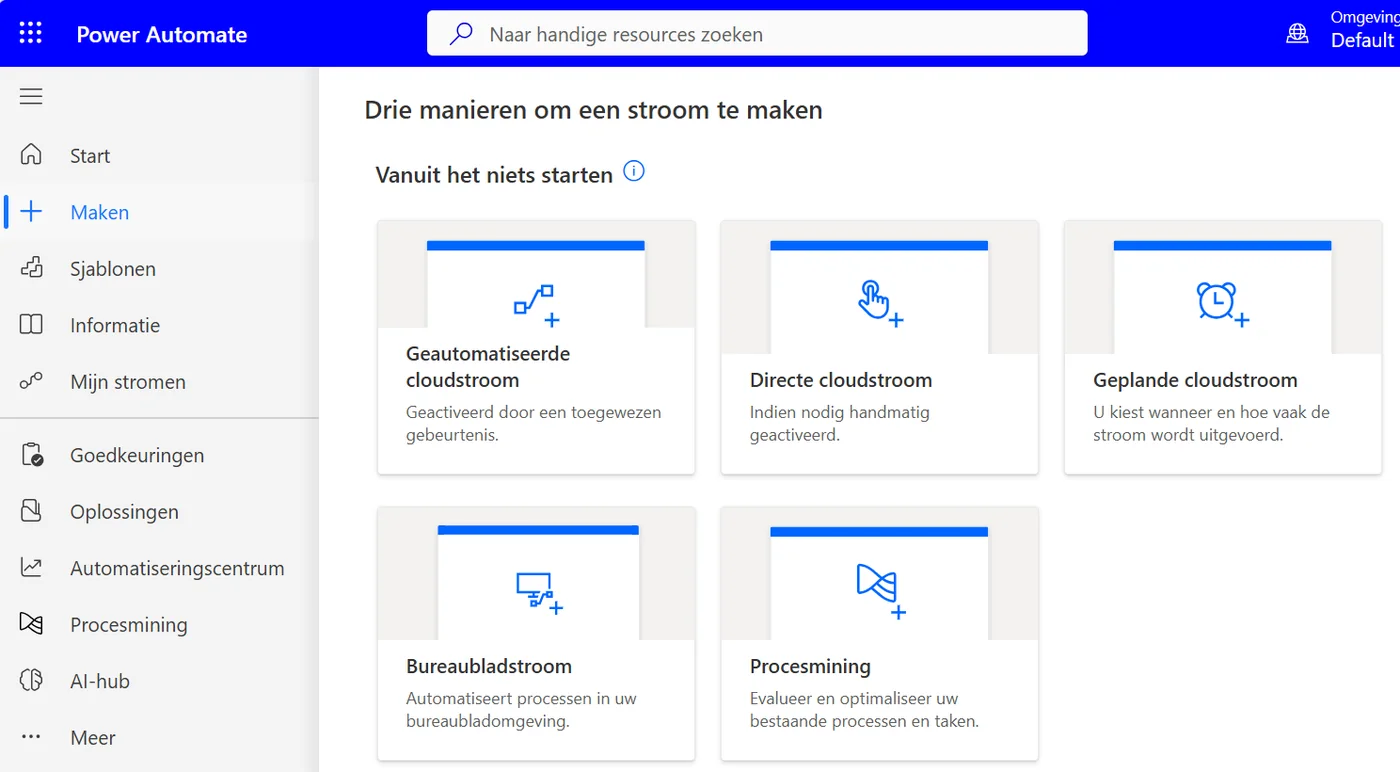
Choose Automated cloud flow. Tap the image to enlarge. It shows the Dutch interface. -
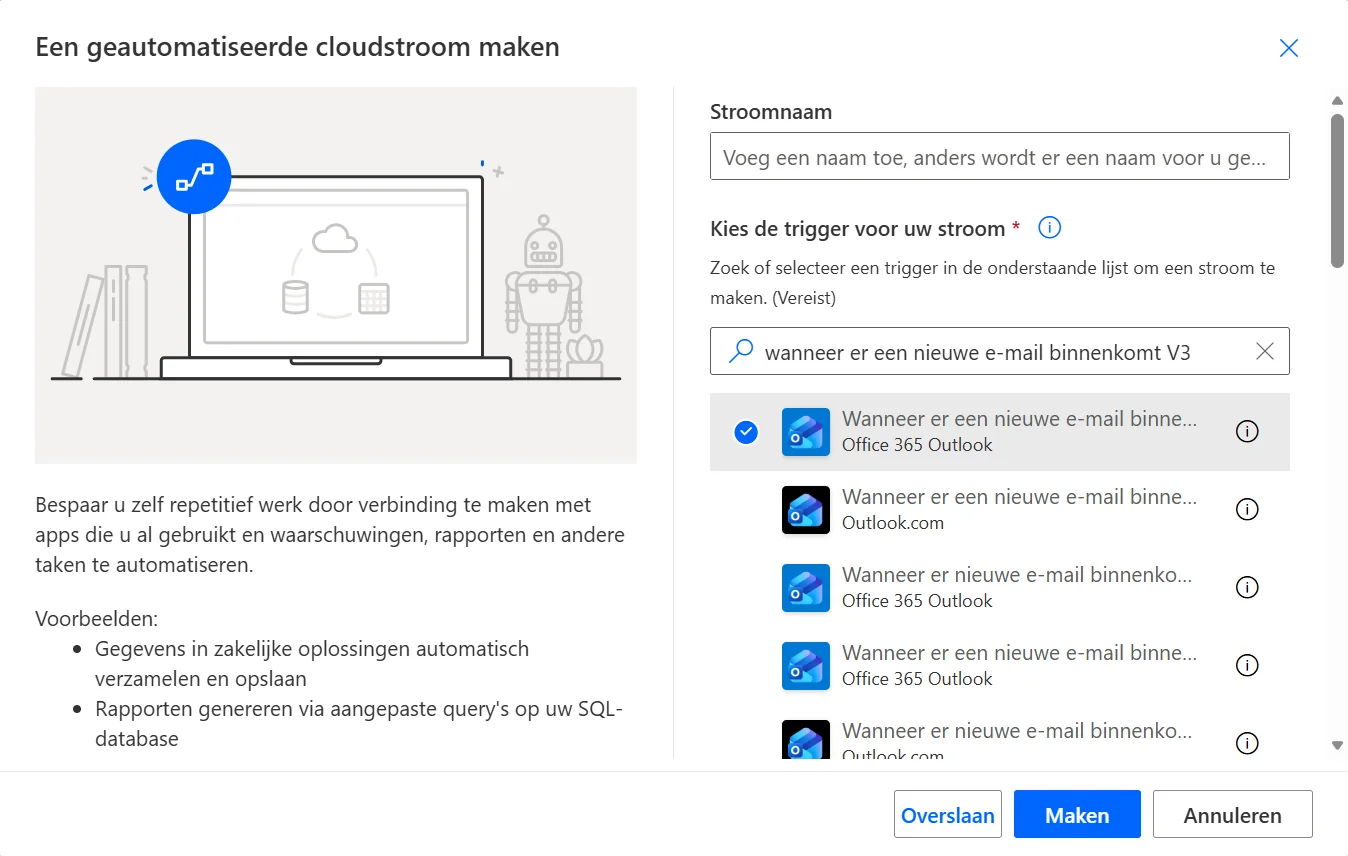
Name the flow and choose the Office 365 Outlook trigger. Tap the image to enlarge. It shows the Dutch interface. -
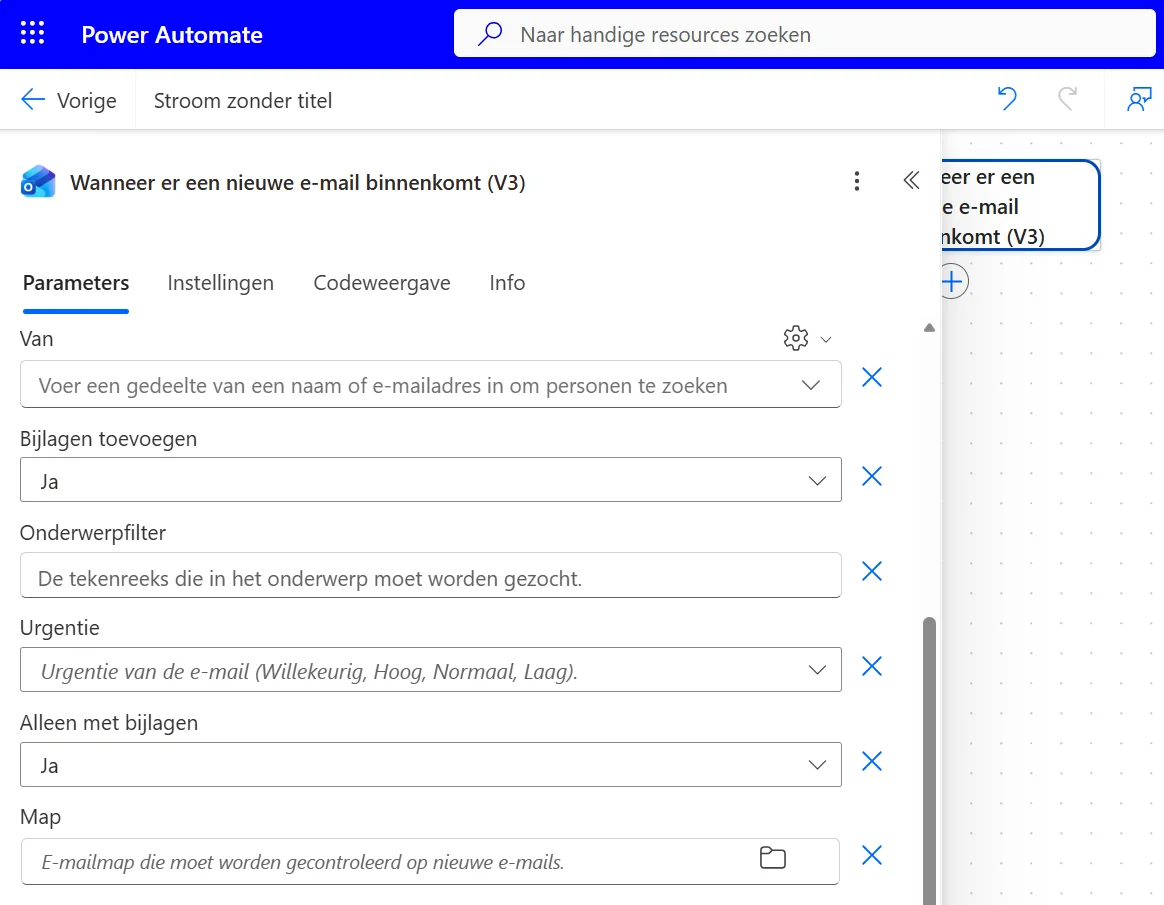
Set Include Attachments and Only with Attachments to Yes. Tap the image to enlarge. It shows the Dutch interface. -
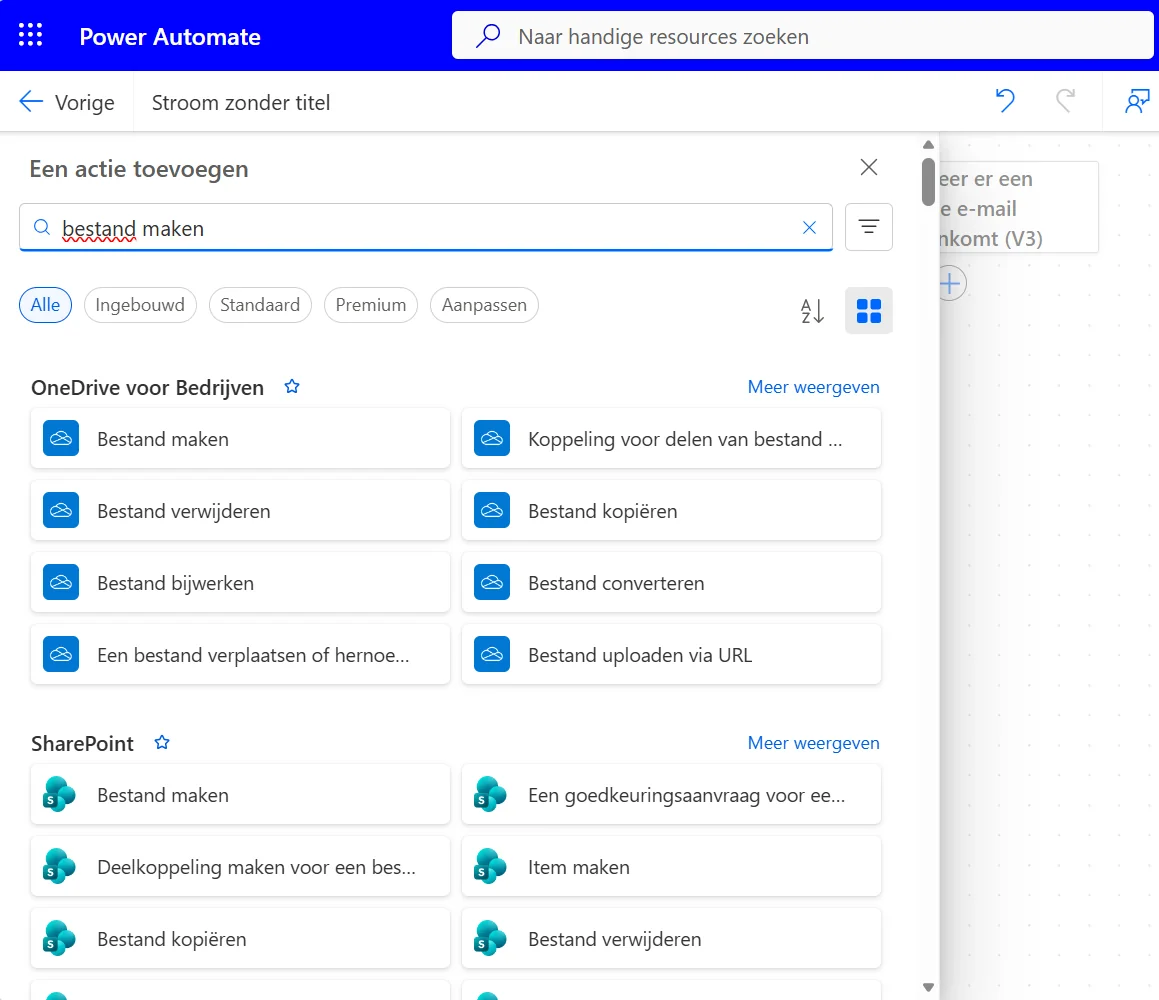
Choose Create file from OneDrive for Business, not the SharePoint one. Tap the image to enlarge. It shows the Dutch interface. -
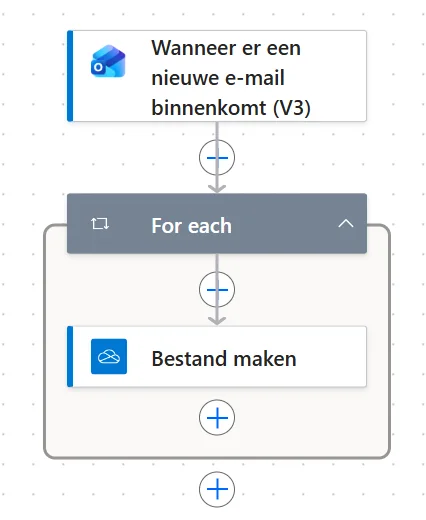
The action is placed in a loop automatically. Tap the image to enlarge. It shows the Dutch interface. -
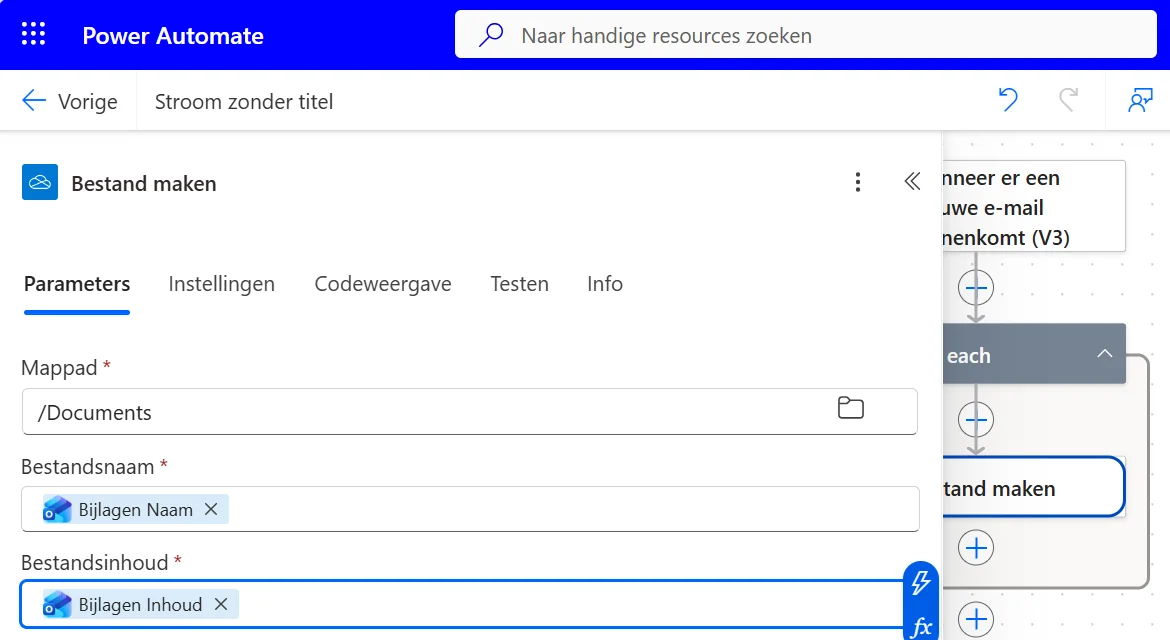
This is what the completed action looks like. Tap the image to enlarge. It shows the Dutch interface. -
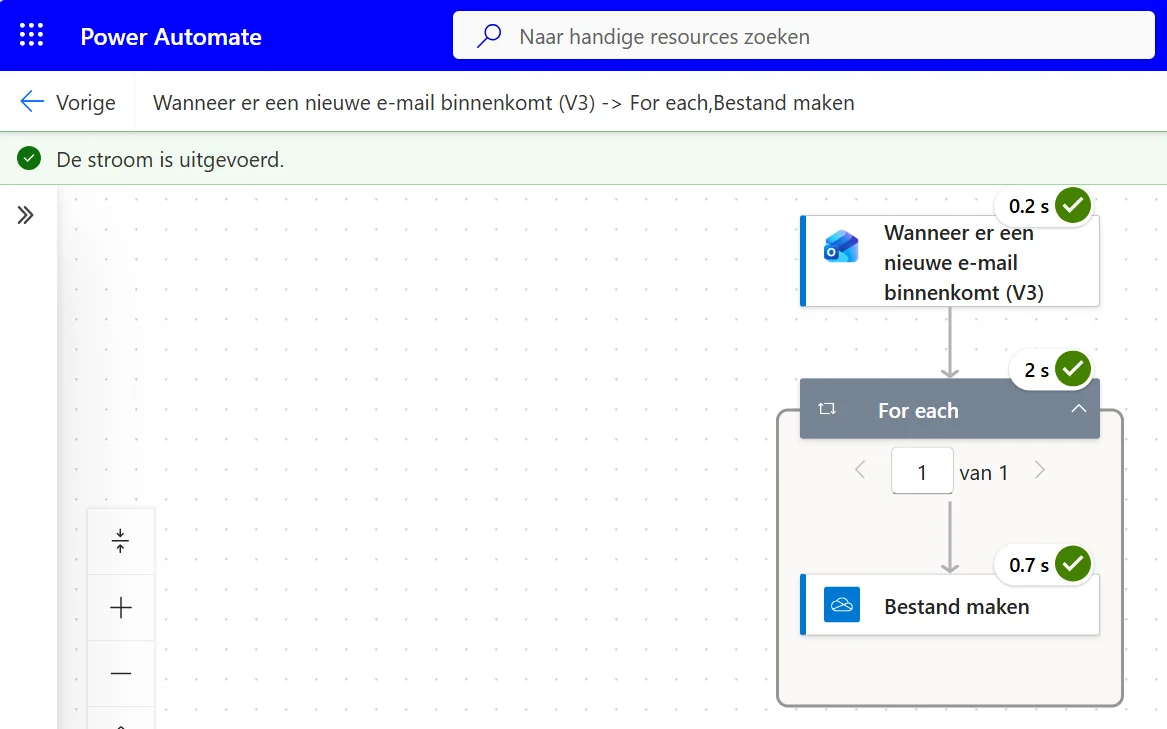
After a successful test, every step has a green check mark. Tap the image to enlarge. It shows the Dutch interface.
Not working? Open the flow via My flows and look at the Run history. It shows what happened in each step and where it went wrong.
Last updated: